
Christmas Cookie Baking Candid Photo Ideas
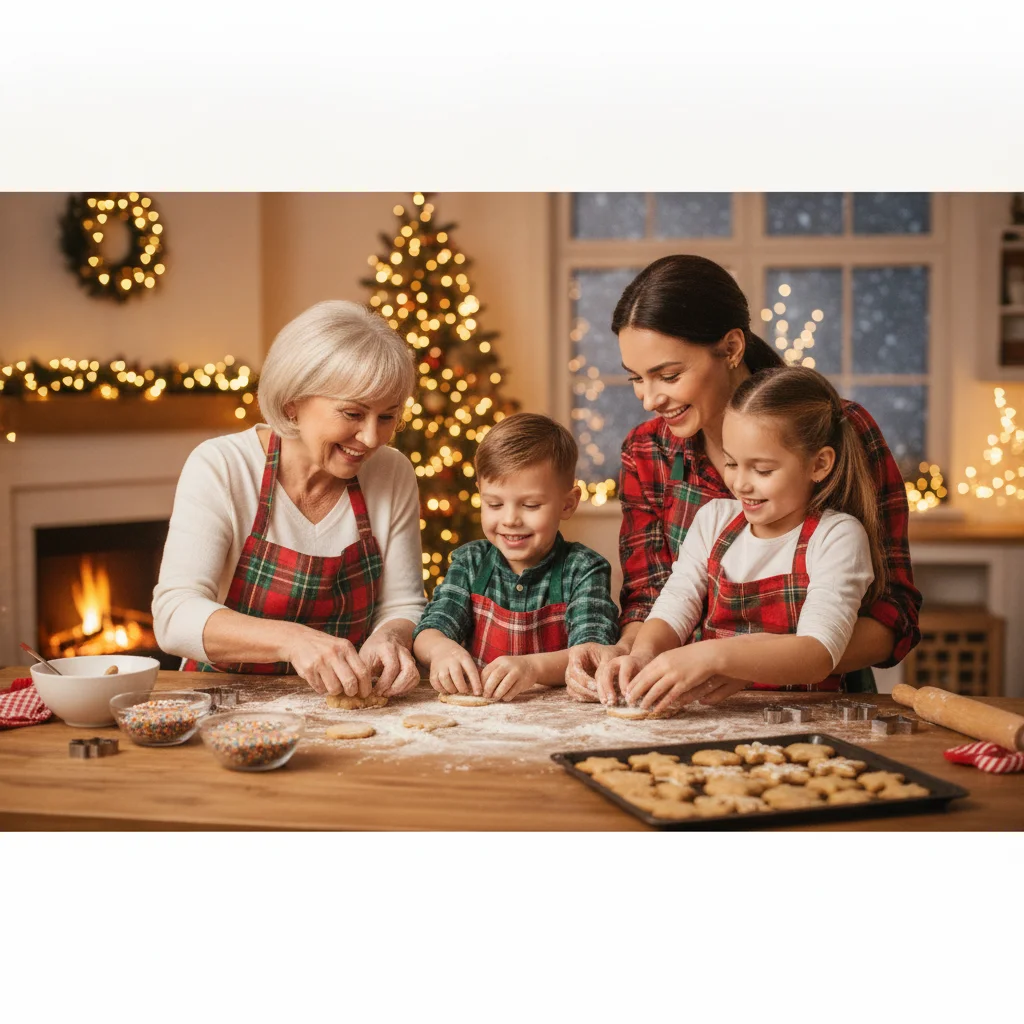
Quick answer: The best Christmas cookie baking candid photos capture real actions rather than staged poses. Photograph flour-covered hands, children choosing sprinkles, dough being rolled, cookies entering the oven, and reactions to finished treats. Use window light, keep the kitchen slightly imperfect, and shoot continuously during quick moments so expressions and interactions feel natural.
Christmas cookie baking creates candid photo opportunities because hands stay busy, expressions change quickly, and the kitchen fills with recognizable seasonal details. Instead of asking everyone to look at the camera, photograph the process as it happens. Spilled flour, uneven icing, crowded cooling racks, and children reaching for decorations often tell a stronger story than a polished group portrait.
Which moments make the best candid baking photos?
Begin before the cookies reach the oven. Ingredient preparation provides clear actions such as measuring sugar, cracking eggs, opening butter wrappers, and passing mixing bowls. These small tasks help people forget about the camera.
Watch for reactions as well as actions. A child tasting icing, a baker noticing a misshapen cookie, or relatives laughing about a decorating mistake can become the most memorable image from the session.
- Flour being scattered across a work surface
- Hands pressing cookie cutters into dough
- Family members sharing rolling pins or mixing bowls
- Sprinkles falling onto freshly iced cookies
- Someone checking cookies through the oven door
- The first taste of a warm finished cookie
How can a kitchen look natural without appearing distracting?
Clear unrelated clutter while keeping useful baking items visible. Dish soap, mail, charging cables, and food packaging can draw attention away from the people. Mixing bowls, wooden spoons, cookie cutters, towels, and ingredient jars support the story and can remain in the frame.
A candid kitchen does not need to look spotless. A light dusting of flour and a few scattered decorations create context. Check the background before shooting, especially behind faces, so cabinet handles, utensils, or bright packages do not appear to grow from someone’s head.
What lighting works for Christmas cookie baking photos?
Window light is usually the simplest option. Position the main activity beside a window rather than directly in front of it. Side lighting reveals the texture of dough, powdered sugar, icing, and hands without making people squint.
Turn off harsh overhead lights if they create orange color casts or dark eye sockets. If the room is dim, move the work area closer to a window or use a lamp bounced off a pale wall. Direct on-camera flash can flatten faces and make metal trays look overly reflective.
| Kitchen condition | Practical approach | Photo to try |
|---|---|---|
| Bright window light | Place bakers beside the window | Hands rolling dough |
| Dim afternoon | Use a wider aperture or night mode | Quiet decorating scene |
| Mixed light colors | Turn off unnecessary bulbs | Natural skin tones near a window |
| Reflective surfaces | Change the camera angle | Cookies on a matte board |
Which camera angles tell the baking story clearly?
Shoot from several heights. An overhead angle shows the arrangement of dough, cutters, and hands. Eye-level photographs capture expressions and conversations. A low angle near the counter makes rolling pins, cookie shapes, and falling flour feel more immediate.
Include wide, medium, and close photographs. A wide image establishes the kitchen and everyone involved. Medium frames show two people working together. Close details preserve sticky fingers, icing patterns, handwritten recipes, and cookies cooling on a rack.
Phones often switch lenses quickly, but the standard lens generally produces more natural faces than an ultra-wide lens. Step back when possible instead of placing an ultra-wide camera close to someone’s face.
How do you photograph children without forcing poses?
Give children a real task with simple instructions. Ask them to choose a cookie cutter, add sprinkles, arrange cookies on a tray, or show a finished design to another family member. Photograph the activity rather than requesting a smile.
Use burst mode for fast actions such as throwing flour, squeezing icing bags, or reaching across the table. Keep a safe distance from hot trays, open ovens, sharp tools, and unstable stools. An adult should supervise the baking while the photographer concentrates on pictures.
How can finished cookies become part of the candid story?
Do not stop photographing when decorating ends. Capture cookies being moved to cooling racks, broken in half, packed into tins, served with milk, or offered to relatives. These closing moments provide a natural ending to the visual sequence.
For a simple cookie portrait, place several finished cookies near a window and include evidence of the process, such as a used cutter or icing bag. Photograph from directly above for a tidy record, then lower the camera to show texture and thickness.
The strongest Christmas cookie baking candid photos combine real interaction, recognizable baking details, and uncomplicated light. A complete set should show preparation, cooperation, small mishaps, finished cookies, and the people enjoying what they made.
What limitations should you expect when taking candid baking photos?
Kitchens can be dark, crowded, and visually busy. Fast hand movements may blur in low light, while windows can create bright backgrounds. Exposure adjustments, burst shooting, and careful positioning help, but some missed frames are normal.
Truly candid photographs also provide less control over facial expressions, clothing, and object placement. Avoid interrupting every activity to correct minor details. Remove genuine safety hazards first, then accept a reasonable amount of mess as part of the story.
Respect anyone who does not want to be photographed, especially children and guests. Before sharing images publicly, confirm that the people shown are comfortable with the selected photographs and with the intended audience.
What Usually Goes Wrong With Christmas Cookie Baking Candid Photos?
Christmas cookie baking candid photos usually fail when the baking action hides faces, everyone watches the camera, or flour, bowls, and cabinet clutter compete with the people. Keep one section of counter active, place the main mixing bowl slightly below face level, and ask family members to continue a real task rather than pause for each shot. Avoid photographing only the messiest instant: capture a short sequence of rolling, cutting, decorating, tasting, and cleanup gestures so at least one frame has visible expressions and readable action. Wipe greasy fingerprints from the lens, turn off conflicting overhead bulbs near a window, and keep flour tosses small and behind the subject rather than across a face. There is no reliable universal failure rate for this type of home photo.
Busy sleeves, crowded counters, and tight crops can weaken cookie-baking candids
The common belief that festive outfits, abundant kitchen décor, and tight framing automatically improve cookie-baking candids is mistaken: fitted sleeves, a quieter work area, and space around active hands usually photograph more clearly. Avoid wide cuffs, dangling jewelry, and clothing that blends into aprons or flour-covered counters. Clear unrelated appliances, packaging, and dishes from the backdrop, but retain useful baking details such as bowls, rolling pins, and cooling racks. When cropping, do not cut through wrists while someone kneads dough, decorates cookies, or carries a tray. Include enough counter space to show what the hands are doing. For group images, check the frame edges for clipped elbows and partially visible people. A slightly wider composition can be cropped later, while missing gestures and ingredients cannot be restored.
Frequently asked questions
What camera settings work for candid cookie baking photos?
Use a shutter speed around 1/250 second for moving hands and faster settings for flour tosses or excited children. Auto ISO and continuous autofocus can help when light and distance change quickly.
How do I avoid blurry baking photos indoors?
Move the activity closer to a window, hold the camera steadily, and use burst mode during quick actions. Increasing ISO is usually preferable to losing an important moment to motion blur.
Should everyone wear matching Christmas outfits?
Matching outfits are optional and can make photographs feel more planned. Coordinated colors, simple aprons, or everyday clothing often support a more natural documentary style.
Can I take good cookie baking photos with a phone?
A phone works well when the lens is clean and the kitchen has adequate light. Tap on the main subject to set focus, avoid digital zoom, and take several frames of each action.
How can I include someone who does not enjoy being photographed?
Photograph the person’s hands, apron, silhouette, or interaction with another baker instead of requesting a direct portrait. Always respect a clear request not to appear in photographs.
What props are useful for Christmas cookie photos?
Cookie cutters, cooling racks, parchment paper, rolling pins, recipe cards, icing bags, and simple seasonal towels add context. Props should support real baking activity rather than crowd the work surface.
When should I photograph the finished cookies?
Photograph them immediately after decorating, again on the cooling rack, and once they are served or packed. This sequence connects the finished treats to the people and process behind them.
How do I keep flour from hiding faces in cookie baking photos?
Use only a pinch of flour and toss it from the side or behind the baker, not toward the camera or face. Ask the person to look at the dough or another family member while you shoot a brief burst. Large clouds usually obscure expressions and create cleanup delays.
Why do my cookie baking candids look staged?
They look staged when everyone stops the activity and performs the same gesture for the camera. Give each person a genuine job, such as rolling dough, choosing cutters, or adding icing, then photograph interactions between steps. Start shooting before announcing a photo and avoid repeatedly asking people to smile or look up.
What should children wear for cookie baking photos?
Children should wear comfortable clothing with fitted or rolled sleeves that will not drag through dough or icing. Medium-toned solid colors tend to separate clearly from pale flour, dark counters, and patterned aprons. Avoid dangling accessories and stiff outfits that restrict natural reaching, stirring, or decorating movements.