
How to Create a DIY Christmas Photo Backdrop
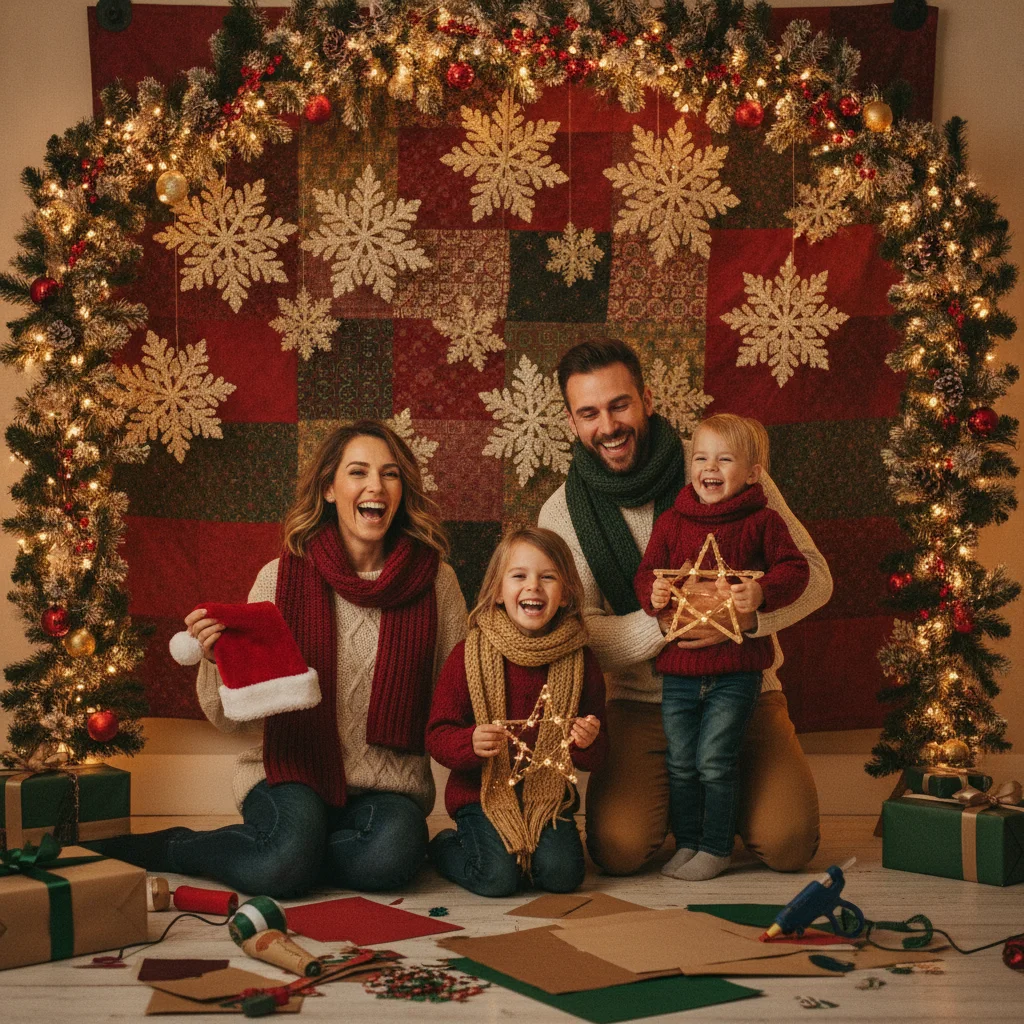
Quick answer: To create a DIY Christmas photo backdrop, hang a wrinkle-free fabric or paper background, add a few large seasonal decorations, and place soft lights in front of the subject. Build the backdrop wider than the camera frame, keep decorations secure, and leave enough distance between the subject and background to produce flattering, natural-looking Christmas photos.
A homemade Christmas photo backdrop can turn a blank wall, living room corner, or covered porch into a festive portrait area. The best designs use a simple background, a limited color palette, and decorations that appear clearly on camera without distracting from the people in the photograph.
You do not need professional studio equipment. Fabric, wrapping paper, garland, removable hooks, string lights, and household lamps can produce an attractive setup when they are arranged carefully.
What materials do you need for a DIY Christmas photo backdrop?
Start with one large material that will cover the visible background. A plain sheet, curtain, tablecloth, roll of kraft paper, or photographic paper can work. Choose a matte surface because glossy materials may reflect lamps or camera flashes.
Gather fasteners that match the installation area. Removable wall hooks, painter's tape, clamps, curtain rods, and a portable backdrop stand are common options. Confirm that tape and hooks are suitable for the wall finish before installation.
- One fabric, paper, or curtain background
- Removable hooks, clamps, or painter's tape
- Garland, wreaths, paper snowflakes, or oversized ornaments
- Battery-powered string lights
- A stool, bench, rug, or wrapped empty boxes
- One or two lamps with soft white bulbs
- Extension cords and cord covers, if required
Which backdrop style is easiest to make?
A fabric backdrop with garland is usually the easiest option. Hang a white, cream, red, or dark green sheet so that it reaches from above head height to the floor. Smooth major wrinkles with a steamer or iron before hanging the fabric.
Attach garland across the top or down one side to create an asymmetrical frame. Add a wreath, several paper stars, or a small group of ornaments. Limiting the display to two or three decorative elements helps the finished photograph look organized.
| Backdrop idea | Best setting | Difficulty |
|---|---|---|
| White sheet with paper snowflakes | Children and family portraits | Easy |
| Kraft paper with painted trees | Rustic or playful photos | Easy |
| Curtain with garland and lights | Formal indoor portraits | Moderate |
| Wrapped-box wall | Party photo booth | Moderate |
How should you assemble the Christmas backdrop?
- Measure the camera frame. Mark the widest and tallest area that will appear in the photograph. Extend the backdrop at least 12 inches beyond each edge.
- Prepare the background. Remove wrinkles, folds, loose threads, and visible labels before hanging it.
- Secure the top edge. Use several attachment points so the weight is distributed evenly.
- Add decorations. Place the largest item first, then fill small gaps with lighter ornaments or paper decorations.
- Create a floor area. Extend fabric onto the floor or add a rug to hide the wall seam and provide a clear posing spot.
- Check the camera view. Take a test photograph and remove any objects that look crowded, crooked, or distracting.
How can you light a homemade Christmas photo backdrop?
Place the subject about three to six feet in front of the backdrop. This distance reduces harsh background shadows and keeps decorative lights from competing with the subject's face.
Use window light when possible. Position the subject so the window is in front and slightly to one side, rather than directly behind. For evening photographs, place two lamps in front of the subject at roughly 45-degree angles.
Cover harsh lamp light with a proper photography diffuser or bounce the light off a white wall. Do not place fabric, paper, or homemade coverings against hot bulbs. Battery-powered LED lights are preferable for backdrop decorations because they generate little heat and reduce visible cords.
How can you make the backdrop look better in photos?
Select a color palette before decorating. Red, green, and gold create a traditional look, while white, silver, and pale blue suit a snowy theme. Neutral kraft paper, dark green foliage, and warm white lights create a rustic setting.
Use large decorations instead of many tiny pieces. Small decorations often disappear in wide family photographs. A wreath, oversized bow, miniature tree, or stack of empty wrapped boxes will remain recognizable from several feet away.
Photograph the setup from the intended camera position. The camera may reveal empty edges, reflective tape, tangled cords, or uneven garland that is not obvious while standing beside the backdrop.
What safety precautions should you follow?
Anchor tall stands and freestanding decorations with sandbags or suitable weights. Keep electrical cords away from walkways, and use cord covers where guests or children could trip.
Avoid glass ornaments in areas used by children or pets. Use flame-resistant materials when available, inspect string lights for damaged wiring, and keep all decorations away from candles, fireplaces, heaters, and hot lamps.
What are the limitations of a DIY Christmas photo backdrop?
Thin sheets may show wall colors, windows, or objects behind them. Layering two sheets or choosing heavier curtains can improve coverage. Paper backdrops can tear when stepped on, especially during group photographs.
Small rooms also limit camera distance and group size. A phone's standard camera lens usually creates more natural portraits than an ultra-wide lens, which can distort faces near the frame edges.
A successful DIY Christmas photo backdrop depends more on clean composition and soft lighting than expensive decorations. Start with a smooth background, add a few camera-friendly seasonal elements, and take test photos before inviting everyone into the frame.
Which camera settings make a DIY Christmas photo backdrop print-ready?
Use soft, even lighting and capture the photo at full resolution with a low ISO to make your DIY Christmas photo backdrop suitable for printing. Place the main light slightly above eye level and about 45 degrees from the subject, then add a weaker light or white reflector on the opposite side to soften shadows. Start around ISO 100–400, use a shutter speed fast enough to prevent motion blur, and choose an aperture that keeps every person sharp. Set white balance for the actual light source so whites and skin tones remain neutral. Avoid digital zoom and heavy cropping. A 5-by-7-inch image intended for 300 DPI output measures 1500 by 2100 pixels (Vistaprint, 2026). Check the final photo at full size for blur, noise, and clipped highlights.
Why does a DIY Christmas photo backdrop look worse at noon than after dark?
Direct sunlight can reach about 100,000 lux, which is why noon can wash out a DIY Christmas backdrop’s string lights and reveal every wrinkle (CIBSE, 2015). This means daylight may overpower decorative lighting, create hard facial shadows, and make thin fabric appear uneven or translucent. It does not mean every daytime setup will fail: open shade, closed curtains, or a room away from direct windows can produce softer results. After dark, string lights become more visible because there is less competing ambient light, but darkness does not automatically improve the photo. Without a separate soft light on the people, faces may look dim while the bulbs become bright spots. Test the backdrop at the same time of day planned for the photo session.
Frequently asked questions
What can I use instead of a professional photo backdrop?
A plain sheet, curtain, tablecloth, kraft paper roll, or wrinkle-free fabric panel can serve as a photo backdrop. Matte, opaque materials usually photograph best.
How large should a Christmas photo backdrop be?
A backdrop for one or two people should generally be at least 5 to 6 feet wide and 7 feet tall. Family groups may require a width of 8 to 10 feet.
How do I hang a backdrop without damaging the wall?
Use removable hooks, painter's tape rated for the surface, or a tension rod where appropriate. Test adhesives in an inconspicuous area first.
Can I use Christmas lights in a photo backdrop?
Battery-powered LED string lights work well because they produce little heat and require fewer visible cords. Secure the battery pack and keep lights away from flammable materials.
How far should people stand from the backdrop?
Place subjects approximately three to six feet in front of the background when space permits. The separation reduces shadows and helps create background blur.
What colors look best for a Christmas photo backdrop?
Traditional red, green, and gold work well, while white, silver, blue, and natural wood tones create alternative seasonal styles. ChristmasCard recommends limiting the palette to two or three main colors.
How can I hide wrinkles in a fabric backdrop?
Steam or iron the fabric according to its care label before installation. Soft front lighting and greater subject-to-background distance can make minor wrinkles less noticeable.
What camera settings should I use for Christmas backdrop photos?
Start with ISO 100–400, an aperture around f/4 to f/8, and a shutter speed of at least 1/125 second for people who may move. Adjust these settings to match your available light. Use full-resolution capture, focus on the nearest person’s eyes, and check that everyone appears sharp before finishing the session.
How do I keep homemade backdrop photos from looking yellow?
Match the camera’s white-balance setting to the dominant light source and avoid mixing daylight with warm household bulbs. If possible, use lights with the same color temperature throughout the scene. A neutral gray card can provide a reference for correction, while a tool such as Adobe Lightroom can fine-tune white balance afterward.
Why do string lights disappear in daytime backdrop photos?
String lights disappear because daylight is much brighter than their decorative glow. Move the backdrop away from direct windows, close sheer curtains, or photograph in open shade. Avoid darkening the entire image just to reveal the bulbs, since that can leave faces underexposed and make the backdrop look dull.