
How Do You Make a DIY Christmas Photo Backdrop?
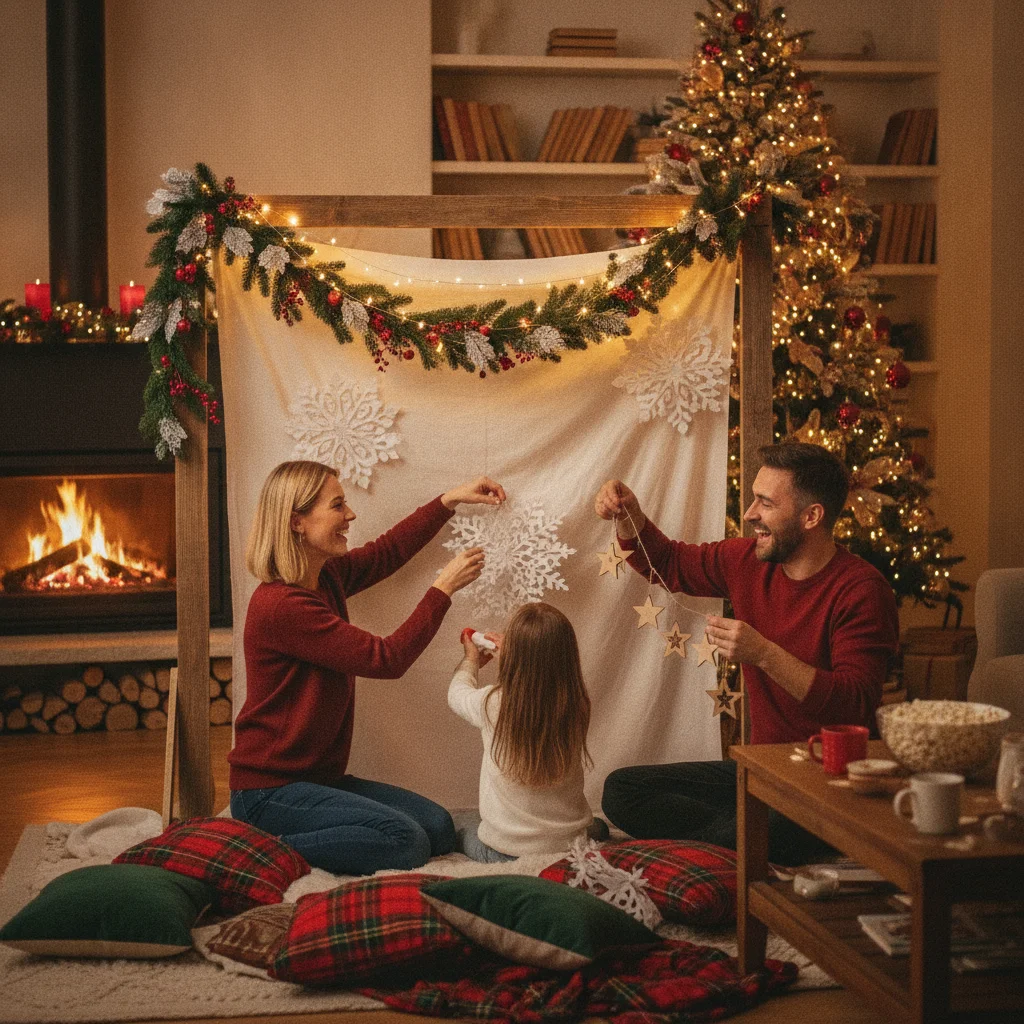
Quick answer: Make a DIY Christmas photo backdrop by hanging wrinkle-free fabric or paper on a blank wall, adding a few coordinated decorations, and placing soft lights in front of the subject. Choose two or three colors, secure every item carefully, and leave enough distance between the backdrop and the people being photographed to reduce shadows.
A homemade Christmas photo backdrop can turn a living room, hallway, or covered porch into a practical holiday photo area. The backdrop does not need elaborate decorations. A clean background, controlled color palette, and flattering light usually produce better photographs than a crowded display.
Plan the setup around the number of people being photographed. A backdrop for one child can be narrow, while a family portrait requires more width, headroom, and floor space. Build the scene before everyone changes into photo outfits so there is time to test the lighting and camera angle.
What materials do you need for a Christmas photo backdrop?
Start with a large background material that does not reflect direct light. Fabric, paper, wrapping paper, curtains, and lightweight canvas can all work. Matte materials are generally easier to photograph than metallic or glossy sheets.
- A plain sheet, curtain, paper roll, or large piece of fabric
- Removable wall hooks, painter's tape, clamps, or a backdrop stand
- String lights, lamps, or soft LED lights
- Garland, paper snowflakes, ornaments, ribbons, or artificial greenery
- A stool, bench, blanket, or small rug
- Scissors, clear fishing line, and extension cords if required
Select only a few decorations that fit a consistent theme. Red, green, and gold create a traditional look. White, silver, and pale blue suggest a winter scene. Neutral fabric with greenery and warm lights suits a simple family portrait.
Which backdrop material works best?
| Material | Best use | Potential issue |
|---|---|---|
| Fabric or sheet | Reusable indoor setup | Wrinkles may appear in photos |
| paper | Clean studio-style portraits | Can tear or crease |
| Wrapping paper | Small, low-cost scenes | Visible joins on wide backdrops |
| Curtains | Quick setup on an existing rod | Folds can create dark lines |
| Tinsel curtain | Party-style portraits | Reflects harsh light |
Iron or steam fabric before hanging it. If wrapping paper is used, align the pattern across adjoining sheets and place the joins behind decorations where possible.
How should you choose and prepare the location?
Choose a space with enough room to move the camera backward. Subjects should ideally stand or sit several feet in front of the backdrop. This separation softens background detail and prevents strong body shadows from falling across the decorations.
Remove wall art, loose cables, and furniture that could appear around the edges. Check the full camera frame rather than judging the scene only by eye. Phone cameras often capture more of the room than expected.
How do you assemble the backdrop step by step?
- Measure the wall and mark the intended width and height of the photo area.
- Attach removable hooks or position a freestanding support. Follow the weight limits for all hooks and stands.
- Hang the main fabric or paper from the top, then smooth it toward the floor.
- Secure the bottom corners so the material cannot shift or create a tripping hazard.
- Add one large decorative feature, such as a garland, wreath, or cluster of paper snowflakes.
- Place smaller decorations unevenly around the main feature to avoid a rigid grid.
- Add a bench, stool, or floor blanket only if it helps position the subjects.
- Take test photos and remove any decorations that overlap faces or create distracting reflections.
For a dimensional winter scene, layer white fabric along the floor and place artificial trees at the outer edges. Keep the central area relatively open so faces remain the focus.
How should you light a homemade Christmas backdrop?
Face the subjects toward a large window when shooting during the day. Indirect window light is usually softer than an overhead ceiling fixture. Turn off lights that create a strong yellow or green color cast unless the entire scene uses warm lighting.
At night, place two lamps or LED lights in front of the subjects at roughly 45-degree angles. Diffuse harsh lamps with equipment designed for that purpose. Do not drape paper, fabric, or improvised diffusers over hot bulbs.
String lights should usually remain on the backdrop rather than directly in front of faces. Increase the distance between the subjects and the lights to create softer glowing points in the background.
How can you make the photos look more polished?
Coordinate clothing with the backdrop without matching it exactly. If the scene contains many red decorations, cream, dark green, denim, or neutral outfits can provide separation. Avoid very small patterns that may look distorted on a screen.
Position the camera near eye level for standing adults and lower it for seated children or pets. Take horizontal and vertical versions. Leave some empty space around the group so the final image can be cropped for cards, social posts, or prints.
What are the limitations of a DIY Christmas photo backdrop?
Thin fabric may reveal the wall behind it, shiny decorations can create glare, and narrow rooms can make group portraits difficult. Home lighting may also produce mixed colors or deep shadows.
A DIY support should not carry heavy wreaths, glass ornaments, or unsecured branches. Keep electrical cords away from walkways, use cool-running lights, and supervise children and pets. Outdoor setups also require wind-resistant supports and decorations suitable for damp conditions.
A successful DIY Christmas photo backdrop depends more on neat construction and soft light than on the number of decorations. Use one simple background, a restrained color scheme, and securely attached accents for a festive scene that keeps attention on the people in the photograph.
Which Lighting and Camera Settings Make a DIY Christmas Photo Backdrop Print-Ready?
For a print-ready DIY Christmas photo backdrop, use soft light from the front or 45 degrees to one side, then choose a low ISO and a shutter speed that prevents motion blur. Start around ISO 100–400, keep the entire group in focus with an aperture near f/5.6–f/8, and adjust shutter speed or light output for a bright exposure without clipped highlights. If the backdrop includes string lights, avoid overexposing the bulbs; move subjects several feet forward so the lights soften while faces remain sharp. Use the camera’s highest-resolution setting and focus on the nearest person’s eye. A 5-by-7-inch image prepared at 300 DPI measures 1500 by 2100 pixels (Vistaprint, 2026). Check the final crop so backdrop edges, stands, and uncovered wall do not enter the card.
Frequently asked questions
How big should a Christmas photo backdrop be?
A backdrop for one or two people should be at least 5 feet wide and 7 feet tall. Family groups may need a width of 8 to 10 feet or more.
Can wrapping paper be used as a photo backdrop?
Wrapping paper works well for small portraits if it is matte and carefully aligned. Glossy paper can reflect lights and show wrinkles.
How do you hang a backdrop without damaging a wall?
Use removable hooks, painter's tape rated for the wall surface, or a freestanding backdrop stand. Test adhesive products in an inconspicuous area first.
How do you remove wrinkles from a fabric backdrop?
Iron or steam the fabric according to its care instructions before hanging it. Pulling the lower corners gently outward can also reduce visible folds.
What colors work best for Christmas photo backdrops?
Traditional red, green, and gold work well, as do winter combinations such as white, silver, and blue. Limiting the design to two or three main colors creates a cleaner image.
Can string lights be used in a Christmas photo backdrop?
Cool-running LED string lights can add warm background points when they are securely attached. Keep lights, plugs, and cords away from fabric folds, children, pets, and walkways.
How far should people stand from the backdrop?
Place people about 3 to 6 feet in front of the backdrop when space allows. The distance reduces shadows and can create softer background detail.
Why does my Christmas photo backdrop look blurry in pictures?
A Christmas photo backdrop usually looks blurry because the camera focused on decorations instead of the people, the shutter speed was too slow, or the subjects stood too close to the backdrop. Select an eye or face as the focus point, steady the camera, add more light, and move everyone forward before taking another photo.
How do you photograph Christmas lights without washing them out?
Expose for the brightest Christmas bulbs while adding soft light to the subjects’ faces. Lower the camera exposure until the bulbs retain color, then brighten faces with a diffused lamp, window light, or flash bounced from a neutral ceiling. Keep reflective ornaments away from direct light to prevent distracting white spots.