
How to Use a Ring Light for Christmas Portraits
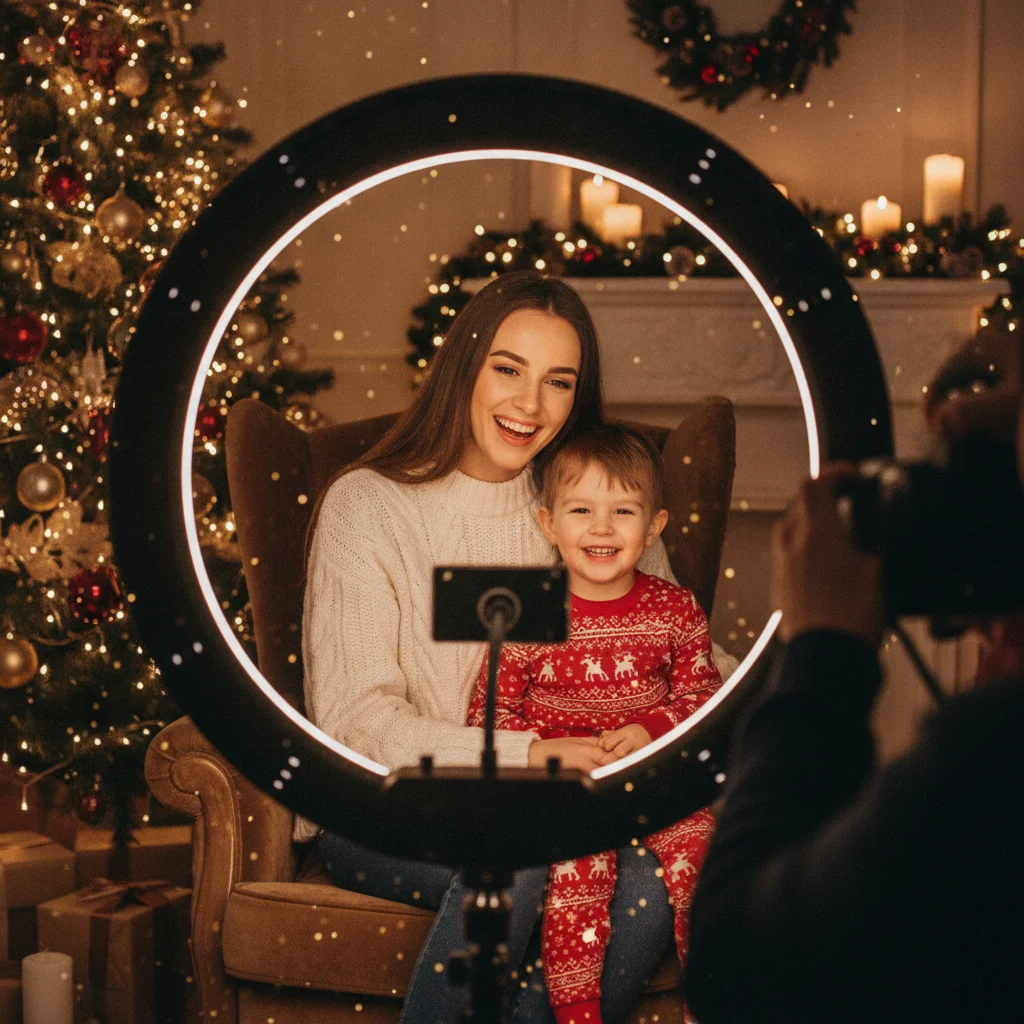
Quick answer: Place the ring light slightly above eye level, position the camera near its center, and start with low brightness. Keep the subject two to four feet from the light and several feet from the Christmas tree. Match the light’s color temperature to the room, expose for faces, and adjust the angle to reduce glare on glasses.
A ring light can produce clean, flattering Christmas portraits with a phone, compact camera, or interchangeable-lens camera. The circular design lights the face evenly and creates a recognizable round catchlight in the eyes. Careful positioning is important because direct frontal lighting can also flatten facial features or reflect in glasses.
Where should you place the ring light?
Place the ring light about two to four feet in front of the subject. Set the center of the ring at eye level or slightly above eye level, then tilt it down toward the face. This position creates gentle shadows under the nose and chin while keeping both eyes illuminated.
Put a phone or camera near the center of the ring for the most even result. If the portrait looks too flat, move the camera and ring light 10 to 30 degrees to one side. A small side angle adds shape to the cheeks without creating harsh shadows.
Keep the subject at least four to eight feet in front of the Christmas tree when space allows. The separation helps tree lights appear softly blurred and prevents branches, ornaments, and wires from competing with the face.
Which ring light settings work for Christmas portraits?
Begin with the brightness at 20 to 40 percent rather than maximum power. Increase it only until the face is properly exposed. Excessive brightness can wash out skin, make subjects squint, and overpower the Christmas lights in the background.
Choose a color temperature that matches the room. A setting around 3,200K to 4,000K generally fits warm household lamps and traditional incandescent-style Christmas lights. A setting near 5,000K to 5,600K suits daylight or cool white decorations. Avoid mixing strongly warm and cool sources on the face.
| Portrait situation | Starting position | Suggested adjustment |
|---|---|---|
| Single adult | Two to four feet away | Place slightly above eye level |
| Child portrait | Three to five feet away | Lower the stand to the child’s height |
| Two people | Four to six feet away | Keep both faces equally close to the light |
| Person wearing glasses | Three to five feet away | Raise and tilt the light or move it off-center |
| Tree-light background | Subject well in front of tree | Lower brightness to preserve background glow |
How should you set the phone or camera?
Tap or focus on the nearest eye. On a phone, reduce exposure slightly if the face or ornaments appear too bright. Portrait mode can blur the background, but check hair, hats, and garland edges because software blur may create visible cutout errors.
With a dedicated camera, start near f/2.8 to f/4 for one person or f/4 to f/5.6 for a couple. Use a shutter speed of at least 1/125 second for adults and 1/200 second for active children. Raise ISO as needed rather than accepting motion blur.
Set white balance manually when the camera keeps changing skin color between frames. Take a test image and confirm that skin looks natural, white clothing is not tinted heavily orange or blue, and bright decorations retain detail.
How can you keep Christmas lights visible?
Turn off bright ceiling fixtures that do not contribute to the portrait. Dim the ring light until the tree lights become visible, then move the light closer to the subject if the face needs more illumination. Moving a light closer increases its effect on the subject without increasing its effect on the distant background.
Use a wider aperture or portrait mode to turn small tree lights into soft circles. More distance between the subject and tree creates stronger blur. Do not place the subject directly against the branches if a glowing background is the goal.
How do you prevent glare and unflattering shadows?
Glasses often reflect the ring as a bright circle. Raise the light above the glasses and tilt it downward until the reflection disappears. Another option is to move the light 20 to 45 degrees to one side while asking the subject to keep looking toward the camera.
Check shiny ornaments, metallic wrapping paper, and glossy furniture for distracting reflections. Shift the light or camera slightly rather than removing every reflective decoration. A small adjustment can move the glare outside the camera’s viewing angle.
If shadows appear behind the subject, increase the distance between the subject and the wall. A pale wall or ceiling can also bounce some light back into the room, making the transition between the lit face and dark background less abrupt.
What step-by-step setup should you follow?
- Arrange the tree and decorations before placing the subject.
- Position the subject several feet in front of the background.
- Set the ring light slightly above eye level and two to four feet away.
- Choose a color temperature that matches the holiday lights.
- Start at low brightness and expose for the face.
- Focus on the nearest eye and take a test portrait.
- Check glasses, ornaments, skin tone, and background lights for glare or clipping.
- Make small changes to angle, distance, or brightness before taking the final series.
What are the limitations of a ring light?
A small ring light may not illuminate a family group evenly. People at the edges or farther from the light can appear darker. A larger soft light or a second diffused light is usually better for groups of three or more.
Frontal ring lighting can reduce facial definition, and the circular eye reflection may not suit every portrait style. Moving the ring light slightly to the side creates more natural modeling. Ring lights also cannot correct severe mixed lighting, so turning off conflicting lamps may be necessary.
Secure the stand, keep cords away from children and pets, and follow the manufacturer’s power and ventilation instructions. Never place the light where it can fall into a tree, candles, or fragile decorations.
A ring light works best for Christmas portraits when it is close, slightly d, and used at modest brightness. Preserve the holiday atmosphere by exposing for the face while keeping enough distance between the subject and tree to show softly blurred lights.
The camera settings that make ring-light Christmas portraits print-ready
For a print-ready ring-light Christmas portrait, use the camera’s full-resolution photo mode, keep ISO low, and reduce ring-light brightness until facial highlights retain detail. On a camera, start in manual mode at ISO 100, 1/125 second, and f/4, then adjust ring output before raising ISO; on a phone, use standard Photo mode, disable digital zoom, and lock focus and exposure on the nearest face. Check the histogram or highlight warning and reduce exposure if skin or white clothing clips. Leave enough space around heads and shoulders for the card crop. A 5-by-7-inch image needs 1500 by 2100 pixels for 300 DPI output (Vistaprint, 2026). Export at those dimensions or larger in sRGB with restrained sharpening. Inspect faces at full size because motion blur, missed focus, and blown highlights will remain visible in print.
Why does the same ring-light setup fail at noon and after dark?
The most common failure is exposure imbalance: at noon, ambient daylight overwhelms the ring light, while after dark the ring light can overpower the room and holiday lights. In a noon portrait, this appears as a bright background with a face that remains shadowed or uneven even when the ring is turned up. At night, look for a pale, flat face against a nearly black room or Christmas tree lights that have lost their color. Before sending the card, inspect the final image at normal viewing size, not just zoomed in. The face should look naturally brighter than the immediate background without seeming cut out, and individual holiday bulbs should still show color. If either the face or background dominates, change the shooting time, reduce competing light, or adjust ring brightness and exposure separately.
Frequently asked questions
Should a ring light be above or below eye level?
A ring light should usually be at eye level or slightly above it. Tilting it downward creates more natural shadows beneath the nose and chin.
What color ring light is best for Christmas photos?
Warm or neutral light around 3,200K to 4,000K often matches indoor Christmas decorations. Cooler settings work when the room contains daylight or cool white holiday lights.
How far should a ring light be from the subject?
Two to four feet is a practical starting distance for one person. Move it farther away for couples, but expect to increase brightness.
How do you avoid ring light reflections in glasses?
Raise the ring light and tilt it downward, or move it slightly to one side. Confirm that the reflection is gone with a test photo before continuing.
Can a ring light photograph a whole family?
A large ring light can cover a small group if everyone is on the same plane. Larger families usually need a broader diffused source or additional lighting.
Can you use a ring light with a Christmas tree background?
Yes, but keep the subject several feet in front of the tree and avoid overpowering its lights. Lower ring light brightness and move the light closer to the subject when needed.
Do you need portrait mode when using a ring light?
Portrait mode is optional and can help blur a busy background. Standard photo mode may produce cleaner edges around hair, Santa hats, and tinsel.
What ISO should I use for ring-light Christmas portraits?
Use the lowest ISO that still allows a sharp exposure, usually ISO 100 or 200 when the ring light is close enough. For moving children or handheld shots, increase ISO only after choosing a shutter speed that stops motion. Check bright ornaments and pale clothing for clipped highlights before taking the final frame.
Why do ring-light Christmas portraits look blurry when printed?
They usually look blurry in print because focus missed the eyes, the shutter was too slow, or the file was cropped too heavily. Place the phone or camera on a tripod, use a short self-timer, focus on the nearest eye, and review the image at full size before editing or resizing it.
Why does my ring light not show up in daylight?
Daylight is often too strong for a small ring light to make a visible difference. Move into open shade or indoors near a window, bring the light closer without placing it in the frame, and expose for the face. If switching the ring light off barely changes the preview, it is not contributing enough.